Hello Everyone,
This a simple pattern for mini pocket tissue holder. Its super easy beginner friendly pattern. It is a stash buster too. Doesn’t require much amount of yarn.
This tiny thing will have a loop to hang it onto almost anything… schoolbags 💼 , backpack 🎒, handbags 👜, baby stroller or prams, baby diaper bags, picnic bag 🧺 and so on…
To make this pocket tissue holder all you need to know is hdc (half double crochet), sc (single crochet), fphdc (front post half double crochet), bphdc (back post half double crochet).
I used 6mm hook as my yarn was bulky. You can choose the yarn and suitable hook of your choice.
Starting chains will decide how wide the opening will be for tissue to come out. You may want to increase the foundation chain as per your size of tissue.
The number of rows will decide the size like I did 18 rows plus final row and I got a rectangle shaped holder. You may want to increase the number of rows to make it squarish.
Pattern:
- Chain (Ch) 19, sc in second ch from the hook.
- Ch1, turn, hdc in same stitch, (skip (sk) 1 stitch (sc, hdc) in next stitch, hdc in next stitch) repeat till end. The row will end with sk 1 stitch and hdc in last stitch.
- Ch1, turn, sc in same stitch and all other stitches
- Repeat row 2
- Repeat row 3
Repeat above two rows until you get desired size. I did about 18 rows. Do any number of row you would like but end it with row 3 that is with sc row so the final row can be easy to work.
Final Row: ch1 turn, hdc in same stitch, work (fphdc in next, bphdc in next) repeat till end. Work hdc in last stitch.
Fasten off.
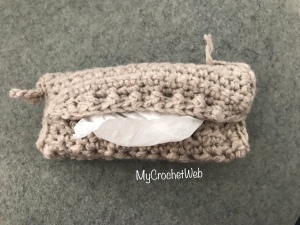
You will see a square or rectangle shape. I did the sewing keeping the good side facing me so you see the seam. I liked it that way however you can do sewing with wrong side facing you and then flip it inside out to hide all seams.
Holding piece good side face down, Fold the piece with overlapping the last two rows 18th & 19th over the first two rows 1st & 2nd. Sew 3 stitches from both sides holding the pieces overlapping. Then sew both the side openings. While sewing the left side, I did 10-12 chains at corner and slip stitched at the bottom where I started chaining. This created a loop which you can use to hang this holder onto anything. You can add key ring to this loop.
If you want seam inside, while folding hold the piece with wrong side face down then fold the first two rows above the last two rows and sew 3 stitches at both sides. Also sew the side openings. Flip the piece inside out. The front post back post ribbing row should come on top.
If you forgot to make that loop or you did seam inside, you can attach yarn at the corner and do the same steps. Or simply tie a ribbon or any decorative thread you like.
Your holder is ready. Pattern is completely customisable so use your creativity keeping in mind the size of the tissue you are going to use in it.
Please like share comment this page. Share your creations here or on your personal social media accounts with #mycrochetweb tag
Thanks for stopping by, Happy Crocheting !
